Installing DNN

Installing DNN is a one step process to create a new website. The installation will detect the current web browserA software application for displaying HTML pages on the World Wide Web. Common browser applications include Microsoft Internet Explorer and Google Chrome. language and if it is English, French, German, Spanish, Italian or Dutch then installer will use that language, otherwise it will remain in English. The default installation creates either a blank website or a website with useful information on getting started with DNN. Evoq Content and Evoq Content Enterprise also include a mobile website template and a sample five page website.

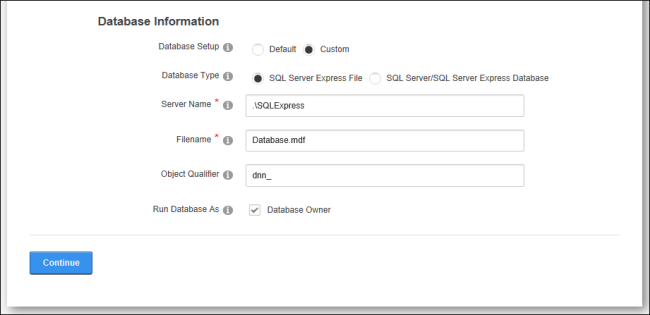
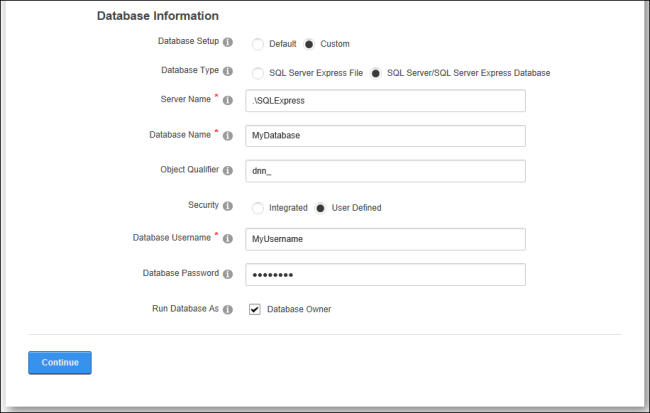
Prerequisite. An SQL Server or SQL Server Express Database. Note: Review the Installation Guide for set-up assistance if using a Microsoft Azure database.

Note: When installing the DNN database on SQL Azure, the connectivity from DNN application may be slower. This occurs because SQL Azure is a cloud service and the latency between the database and the application is increased. To avoid a timeout error during DNN installationRefers to a single installed instance of DNN and all the sites within that installation as listed on the Host > Site Management page., it is recommended that the http timeout (System.Web.HttpException: Request timed out) in the Web.config file is manually increased. This is done by adding an executionTimeout setting under httpRuntime prior to installation. Note: Keyword "executionTimeout" is case-sensitive. In the below configuration setting, a value of 900 indicates 15 minutes which is more than enough for any installation. It is recommended that this setting is removed once installation is complete.

<httpRuntimeuseFullyQualifiedRedirectUrl="true"maxRequestLength="8192"
requestLengthDiskThreshold="8192"executionTimeout="900" />

Option One: One Click Installation

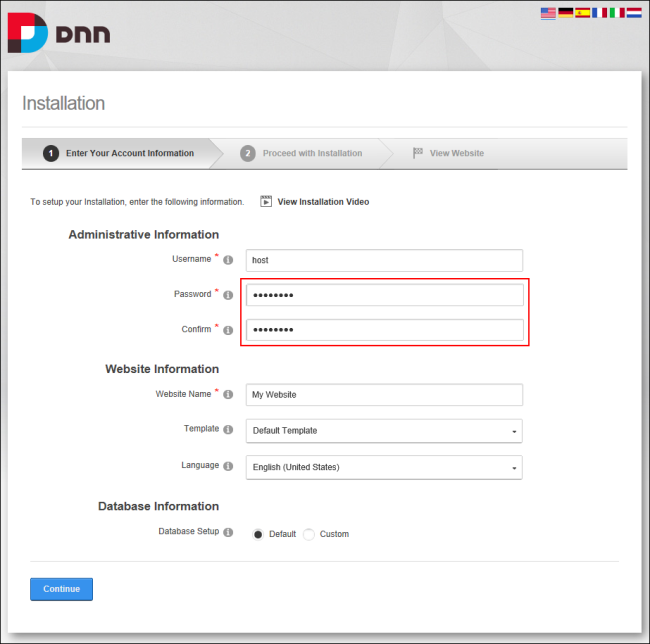
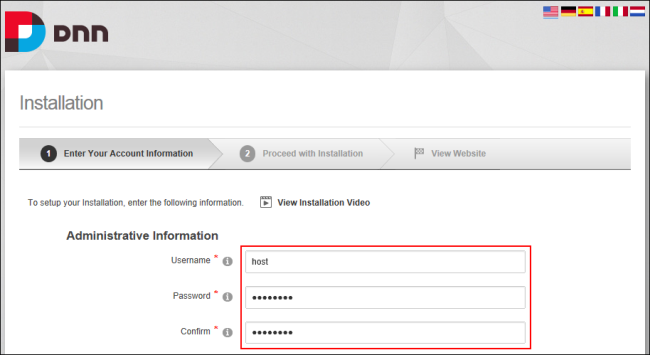
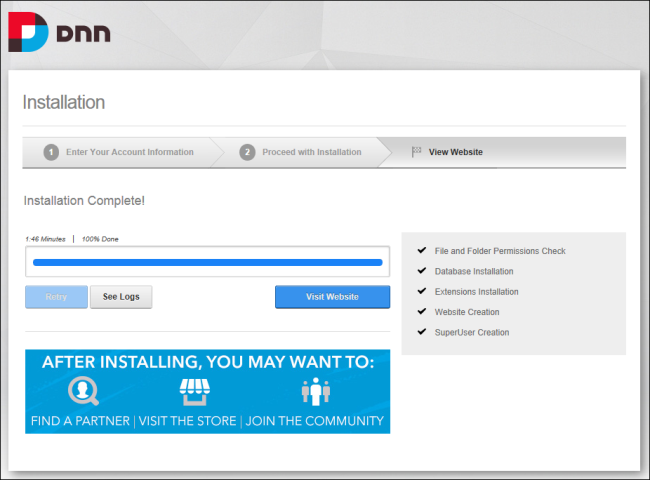
To quickly install DNN and accept all the default settings, simply fill in the two password fields (Password and Confirm) and then click the Continue button.

Option Two: Custom Installation

  1. The Administrative Information section, enter the information for the SuperUserThese users have full access to manage the settings and content of all sites with this DNN installation, including the Host site. SuperUser accounts are created using the Host > SuperUser Accounts module. Account. This user can access all sites created within this installation. We recommend using a strong password, for example: at least 7 characters long and including a mix of letters, numbers and symbols.
    1. Optional. In the Username text box, enter a user name for the SuperUserThese users have full access to manage the settings and content of all sites with this DNN installation, including the Host site. SuperUser accounts are created using the Host > SuperUser Accounts module.. The default value is host.
    2. In the Password text box, enter a password for the SuperUserThese users have full access to manage the settings and content of all sites with this DNN installation, including the Host site. SuperUser accounts are created using the Host > SuperUser Accounts module. account.
    3. In the Confirm text box, re-enter the password for the SuperUserThese users have full access to manage the settings and content of all sites with this DNN installation, including the Host site. SuperUser accounts are created using the Host > SuperUser Accounts module. account.

  1. In the WebsiteRefers to a single and unique site created using DNN. Multiple unique sites can be created and managed within each installed DNN application. Information section, complete these details:
    1. In the WebsiteRefers to a single and unique site created using DNN. Multiple unique sites can be created and managed within each installed DNN application. Title text box, enter a title for the website.
    2. At Template, select the site template (pages and content) to be used for the first website that is created from these options:
      • Blank Template: Select to create the first website without using a template. This creates a site without any pages or content pre-added.
      • Default Template: Select to create a small sample website that provides useful information, movies and links on how to get started building the website. This template is available in a several languages. If a template in a language other than English is selected, then the language pack for the chosen language will be installed on the site and this language will be set as the default site language. In addition, the usual default site language of English will be disabled, but not removed, on the site. Spanish language has been selected for this tutorial.
      • Mobile Template: Select to build a website suitable for a mobile device.
    3. At Language, select the language to use for the website. The default setting is English (United States).

  1. In the Database Connection section, configure the settings used by DNN to connect to a database. DNN is a content management system that uses a database to store the site information. If DNN is being installed in a "Hosting Account" use the detailed given by the provider. Select from these options:
    1. At Database Setup, select one of the following options and complete the associated settings:
      • Default: This option is recommended when installing DNN on a local system. If this option is selected, click the Continue button.
      • Custom: Select from these options:
        • SQL Server Express File:
          1. In the Server Name text box, enter the Name or IP Address of the computer where the Database is located.
          2. In the Filename text box, enter the name of the Database File (located in the App_Data Directory).
          3. Optional. In the Object Qualifier text box, enter a prefix to use for all database objects. This is helpful for avoiding object name clashes. Note: The Object Qualifier must start with a letter and be no longer than 50 characters. E.g. dnn_
          4. At Run Database As, select from these options:
            • Mark  the check box at Database Owner if the SuperUserThese users have full access to manage the settings and content of all sites with this DNN installation, including the Host site. SuperUser accounts are created using the Host > SuperUser Accounts module. is running the database as the database owner.
            • Unmark  the check box at Database Owner to run the database as the User ID specified.

        • or SQL Server/SQL Server Express Database:
          1. In the Server text box, enter the Name or IP Address of the computer where the Database is located.
          2. In the Database Name text box, enter the Database name that was previously created on the SQL server.
          3. Optional. In the Object Qualifier text box, enter a "prefix" to use for all database objects. This helps ensure that there are no object name clashes. E.g. dnn_
          4. At Security, select from these options:
            • Integrated: Select if using SQL Server's Integrated Security and when a Windows account will be used to access SQL Server. If SQL Server Express is being used then this option will most likely need to be selected.
            • User Defined: Select if a User ID/Password has been provided to access the Database and provide the User ID/Password combination.
              1. In the User ID text box, enter the User ID for the Database.
              2. In the Password text box, enter the Password for the Database.
          5. At Run Database As, select from these options:
            • Mark  the check box at Database Owner if running the database as Database Owner.
            • Unmark  the check box at Database Owner if running the database as the User ID specified.

  1. Click the Continue button to begin the installation process which typically takes around one minute.

  1. Click the Visit WebsiteRefers to a single and unique site created using DNN. Multiple unique sites can be created and managed within each installed DNN application. button to open the new site and view a range of helpful getting started resources.

Best Practice: The passwords and details of the HostThese users have full access to manage the settings and content of all sites with this DNN installation, including the Host site. SuperUser accounts are created using the Host > SuperUser Accounts module. (SuperUserThese users have full access to manage the settings and content of all sites with this DNN installation, including the Host site. SuperUser accounts are created using the Host > SuperUser Accounts module.) and AdminRegistered users who are members of the Administrators role. These users have full access to manage the site including adding, deleting and editing all pages and modules. Administrators also have access to the Admin pages located on the main menu. (AdministratorRegistered users who are members of the Administrators role. These users have full access to manage the site including adding, deleting and editing all pages and modules. Administrators also have access to the Admin pages located on the main menu.) accounts created during installation should be updated via the HostThese users have full access to manage the settings and content of all sites with this DNN installation, including the Host site. SuperUser accounts are created using the Host > SuperUser Accounts module. > SuperUsers and AdminRegistered users who are members of the Administrators role. These users have full access to manage the site including adding, deleting and editing all pages and modules. Administrators also have access to the Admin pages located on the main menu. > User Accounts pages respectively.

Note: SuperUsers who are using SQL Azure can ensure objects were successfully created in the SQL Azure database by running the following SQL queries using the SQL Server Management studio. Note: The counts are rough counts for a typical DNN 7+ Platform installation.

--list tables (154 records)

SELECT COUNT(*) FROM sys.Tables

--list stored procedures (869 records)

SELECT COUNT(*) FROM sys.objects

WHERE type = 'P'

--list indexes (402 records)
SELECT COUNT(*) FROM sys.indexes